Velero version 1.1 provides support to backup Kubernetes applications deployed on vSphere. This post will provide detailed information on how to install and configure Velero to backup and restore a stateless application (nginx) that is running in Kubernetes on vSphere. At this time there is no vSphere plugin for snapshotting stateful applications on vSphere during a Velero backup. In this case, we rely on a third party program called restic. However this post does not include an example of how to backup a stateful application. That is available in another tutorial which can be found
here.
Overview of steps
- Download and extract Velero v1.1
- Deploy and Configure a Minio Object store
- Install Velero using the
velero install command, ensuring that both restic support and a Minio publicUrl are included
- Run a test backup/restore of a stateless application that has been deployed on upstream Kubernetes
What this post does not show
- A demonstration on how to do backup/restore of a stateful application (i.e. PVs)
- The assumption is that the Kubernetes nodes in your cluster have internet access in order to pull the Velero images. This guide does not show how to add images using a local repository
Download and extract Velero v1.1
The
Velero v1.1 binary can be found here. Download and extract it to the desktop where you wish to manage your Velero backups, then copy or move the velero binary to somewhere in your $PATH.
Velero sends data and metadata about the Kubernetes objects being backed up to an S3 Object Store. If you do not have an S3 Object Store available, Velero provides the manifest file to create a Minio S3 Object Store on your Kubernetes cluster. This means that all Velero backups can be kept on-premises.
- Note: Stateful backups of applications deployed in Kubernetes on vSphere that use the
restic plugin for backing up Persistent Volumes send the backup data to the same S3 Object Store.
There are a few different steps required to successfully deploy the Minio S3 Object Store.
1. Create a Minio credentials secret file
A simple credentials file containing the login/password (id/key) for the local on-premises Minio S3 Object Store must be created.
$ cat credentials-velero
[default]
aws_access_key_id = minio
aws_secret_access_key = minio123
2. Expose Minio Service on a NodePort
While this step is optional, it is useful for two reasons. The first is that it gives you a way to access the Minio portal through a browser and examine the backups. The second is that it enables you to specify a publicUrl for Minio, which in turn means that you can access backup and restore logs from the Minio S3 Object Store.
To expose the Minio Service on a NodePort, a modification of the examples/minio/00-minio-deployment.yaml manifest is necessary. The only change is to the type: field, from ClusterIP to NodePort:
spec:
# ClusterIP is recommended for production environments.
# Change to NodePort if needed per documentation,
# but only if you run Minio in a test/trial environment, for example with Minikube.
type: NodePort
3. Create the Minio Object Store
After making the changes above, simply run the following command to create the Minio Object Store.
$ kubectl apply -f examples/minio/00-minio-deployment.yaml
namespace/velero created
deployment.apps/minio created
service/minio created
job.batch/minio-setup created
4. Verify Minio Object Store has deployed successfully
Retrieve both the Kubernetes node on which the Minio Pod is running, and the port that the Minio Service has been exposed on. With this information, you can verify that Minio is working.
$ kubectl get pods -n velero
NAME                     READY   STATUS      RESTARTS   AGE
minio-66dc75bb8d-95xpp   1/1     Running     0          25s
minio-setup-zpnfl        0/1     Completed   0          25s
$ kubectl describe pod minio-66dc75bb8d-95xpp -n velero | grep -i Node:
Node:               140ab5aa-0159-4612-b68c-df39dbea2245/192.168.192.5
$ kubectl get svc -n velero
NAME    TYPE       CLUSTER-IP      EXTERNAL-IP   PORT(S)          AGE
minio   NodePort   10.100.200.82   <none>        9000:32109/TCP   5s
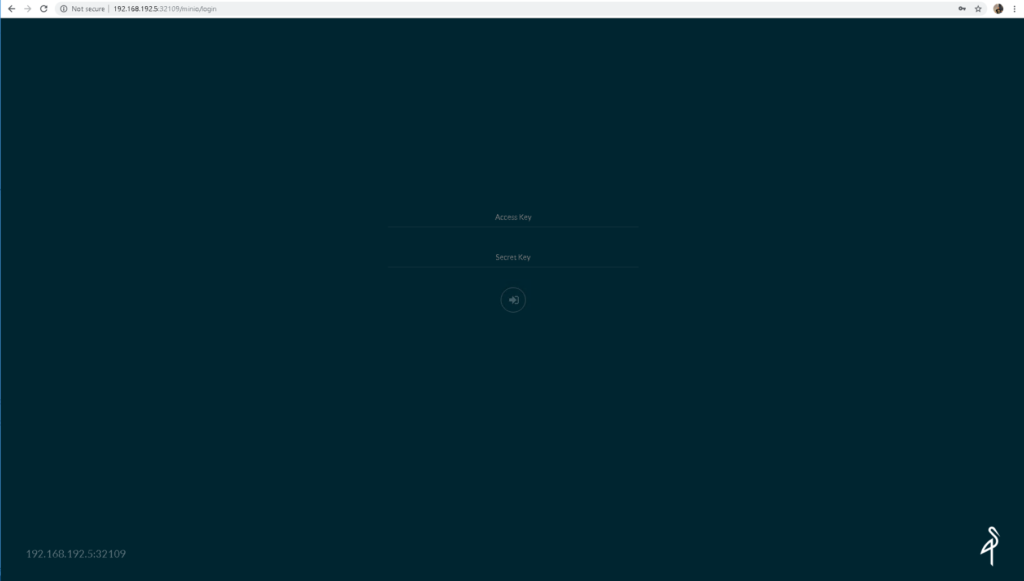
In the above outputs, the node on which the Minio Object Storage is deployed has IP address 192.168.192.5. The NodePort that the Minio Service is exposed is 32109. If we now direct a browser to that Node:port combination, we should see the Minio Object Store web interface. You can use the credentials provided in the credentials-velero file earlier to login.
Install Velero
To install Velero, the velero install command is used. There are a few options that need to be included. Since there is no vSphere plugin at this time, we rely on a third party plugin called restic to make backups of the Persistent Volume contents when Kubernetes is running on vSphere. The command line must include the option to use restic. As we also mentioned, we have setup a publicUrl for Minio, so we should also include this in our command line.
Here is a sample command based on a default installation on Velero for Kubernetes running on vSphere, ensuring that the credentials-velero secret file created earlier resides in the same directory where the command is run:
$ velero install  --provider aws --bucket velero \
--secret-file ./credentials-velero \
--use-volume-snapshots=false \
--use-restic \
--backup-location-config \
region=minio,s3ForcePathStyle="true",s3Url=http://minio.velero.svc:9000,publicUrl=http://192.168.192.5:32109
Once the command is running, you should observe various output related to the creation of necessary Velero objects in Kubernetes. Everything going well, the output should complete with the following message:
Velero is installed! ⛵ Use 'kubectl logs deployment/velero -n velero' to view the status.
Yes, that is a small sailboat in the output (Velero is Spanish for sailboat).
Deploy a sample application to backup
Velero provides a sample nginx application for backup testing. This nginx deployment assumes the presence of a LoadBalancer for its Service. If you do not have a Load Balancer as part of your Container Network Interface (CNI), there are some easily configuration ones available to get your started. One example is MetalLb, available
here.
- Note: This application is stateless. It does not create any Persistent Volumes, thus the restic driver is not utilizied as part of this example. To test whether restic is working correctly, you will need to backup a stateful application that is using Persistent Volumes.
To deploy the sample nginx application, run the following command:
$ kubectl apply -f examples/nginx-app/base.yaml
namespace/nginx-example created
deployment.apps/nginx-deployment created
service/my-nginx created
Check that the deployment was successful using the following commands:
$ kubectl get ns
NAME                  STATUS   AGE
cassandra             Active   23h
default               Active   5d3h
kube-public           Active   5d3h
kube-system           Active   5d3h
nginx-example         Active   4s
velero                Active   9m40s
wavefront-collector   Active   24h
$ kubectl get deployments --namespace=nginx-example
NAME               READY   UP-TO-DATE   AVAILABLE   AGE
nginx-deployment   2/2     2            2           20s
$ kubectl get svc --namespace=nginx-example
NAME TYPE CLUSTER-IP EXTERNAL-IP PORT(S) AGE
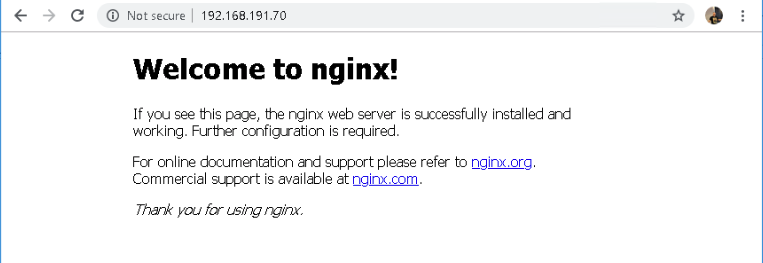
my-nginx LoadBalancer 10.100.200.147 100.64.0.1,192.168.191.70 80:30942/TCP 32s
In this example, a Load Balancer has provided the nginx service with an external IP address of 192.168.191.70. If I point a browser to that IP address, I get an nginx landing page identical to that shown below.
We’re now ready to do a backup and restore of the nginx application.
Take your first Velero backup
In this example, we are going to stipulate at the velero backup command line that it should only backup applications that match app=nginx. Thus, we do not backup everything in the Kubernetes cluster, only the nginx application specific items.
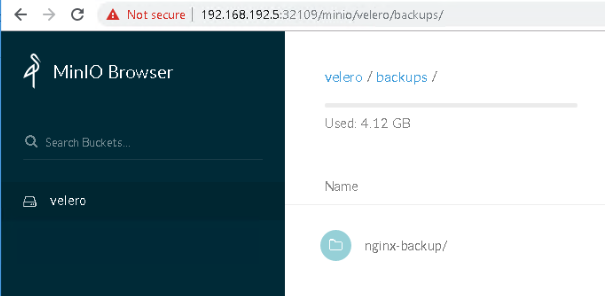
$ velero backup create nginx-backup --selector app=nginx
Backup request "nginx-backup" submitted successfully.
Run `velero backup describe nginx-backup` or `velero backup logs nginx-backup` for more details.

$ velero backup get
NAME           STATUS      CREATED                         EXPIRES   STORAGE LOCATION   SELECTOR
nginx-backup   Completed   2019-08-07 16:13:44 +0100 IST   29d       default            app=nginx
You can now login to the Minio Object Storage via a browser and verify that the backup actually exists. You should see the name of the backup under the velero/backups folder:
Destroy your application
Let’s now go ahead and remove the nginx namespace, then do a restore of the application from our backup. Later we will demonstrate how we can restore our nginx application.
$ kubectl delete ns nginx-example
namespace "nginx-example" deleted
This command should also have removed the nginx deployment and service.
Do your first Velero restore
Restores are also done from the command line using the velero restore command. You simply need to specify which backup you wish to restore.
$ velero backup get
NAME           STATUS      CREATED                         EXPIRES   STORAGE LOCATION   SELECTOR
nginx-backup   Completed   2019-08-07 16:13:44 +0100 IST   29d       default            app=nginx
$ velero restore create nginx-restore --from-backup nginx-backup
Restore request "nginx-restore" submitted successfully.
Run `velero restore describe nginx-restore` or `velero restore logs nginx-restore` for more details.
The following command can be used to examine the restore in detail, and check to see if it has successfully completed.
$ velero restore describe nginx-restore
Name:         nginx-restore
Namespace:    velero
Labels:       <none>
Annotations:  <none>

Phase:  Completed

Backup:  nginx-backup

Namespaces:
  Included:  *
  Excluded:  <none>

Resources:
  Included:        *
  Excluded:        nodes, events, events.events.k8s.io, backups.velero.io, restores.velero.io, resticrepositories.velero.io
  Cluster-scoped:  auto

Namespace mappings:  <none>

Label selector:  <none>

Restore PVs:  auto
Verify that the restore succeeded
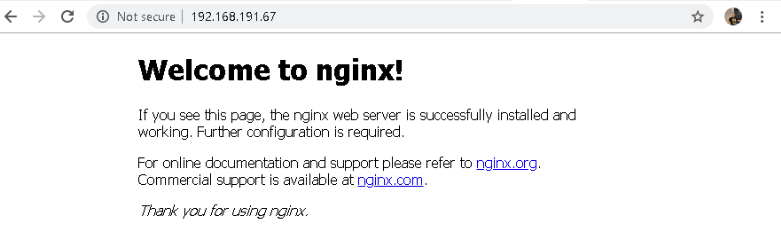
You can see that the restore has now completed. Check to see if the namespace, DaemonSet and service has been restored using the kubectl commands shown previously. One item to note is that the nginx service may be restored with a new IP address from the LoadBalancer. This is normal.
Now let’s see if we can successfully reach our nginx web server on that IP address. Yes we can! Looks like the restore was successful.
Backups and Restores are now working on Kubernetes deployed on vSphere using Velero v1.1.
Feedback and Participation
As always, we welcome feedback and participation in the development of Velero.
All information on how to contact us or become active can be found here
You can find us on
Kubernetes Slack in the #velero channel, and follow us on Twitter at
@projectvelero.